
Setting Up the Alarm on Your JALL Sunrise Alarm Clock
To set up your JALL Sunrise Alarm Clock, start by plugging it in and pressing the alarm button to activate the alarm mode. Use the +/- buttons to adjust the alarm time. Ensure the sunrise simulation duration is set according to your preference. Press the alarm button again to save your settings. This process ensures your alarm is ready to wake you gently with a simulated sunrise.
Step 1: Locate the User Manual
Locating the user manual is the first essential step in setting up your JALL Sunrise Alarm Clock. The manual provides detailed instructions and safety information necessary for proper usage. It can typically be found in the product packaging or downloaded from the manufacturer’s website. Once you have the manual, familiarize yourself with its contents, as it will guide you through the alarm setup process and explain all the clock’s features. Ensure you have the manual handy before proceeding with any settings to avoid confusion. Reading through the manual will help you understand how to activate the alarm, set the time, adjust the sunrise simulation, and utilize additional features. This step is crucial for ensuring a smooth and successful setup experience.
Step 2: Familiarize Yourself with the Buttons
Familiarizing yourself with the buttons on your JALL Sunrise Alarm Clock is crucial for navigating its features and settings. The clock typically has a set of buttons located on the top or side, each serving a specific function. The Alarm 1 and Alarm 2 buttons are used to activate and manage dual alarms, allowing you to set different wake-up times for weekdays and weekends. The +/- buttons are essential for adjusting the alarm time, sunrise simulation duration, and volume levels. Pressing the Snooze button temporarily pauses the alarm, giving you a few extra minutes of sleep.
The Brightness button adjusts the display light, ensuring it’s comfortable for your eyes. Some models also feature a FM Radio button, allowing you to wake up to your favorite station or set it as a backup alarm sound. Additionally, buttons like White Noise or Sunset Simulation may be present, enabling you to customize your sleep and wake experiences. Understanding the purpose of each button will help you navigate the clock’s settings effortlessly. Take a moment to explore these controls before moving on to setting up your alarm to ensure a seamless experience.
- Alarm 1/Alarm 2: For enabling and managing dual alarms.
- +/-: For adjusting time, volume, and brightness.
- Snooze: To pause the alarm temporarily.
- Brightness: To adjust the display light intensity.
- FM Radio: For tuning into radio stations or setting a radio alarm.
- White Noise/Sunset Simulation: For additional sleep-enhancing features.
By understanding these buttons, you’ll be able to fully utilize your JALL Sunrise Alarm Clock’s features and customize your wake-up experience to suit your preferences.
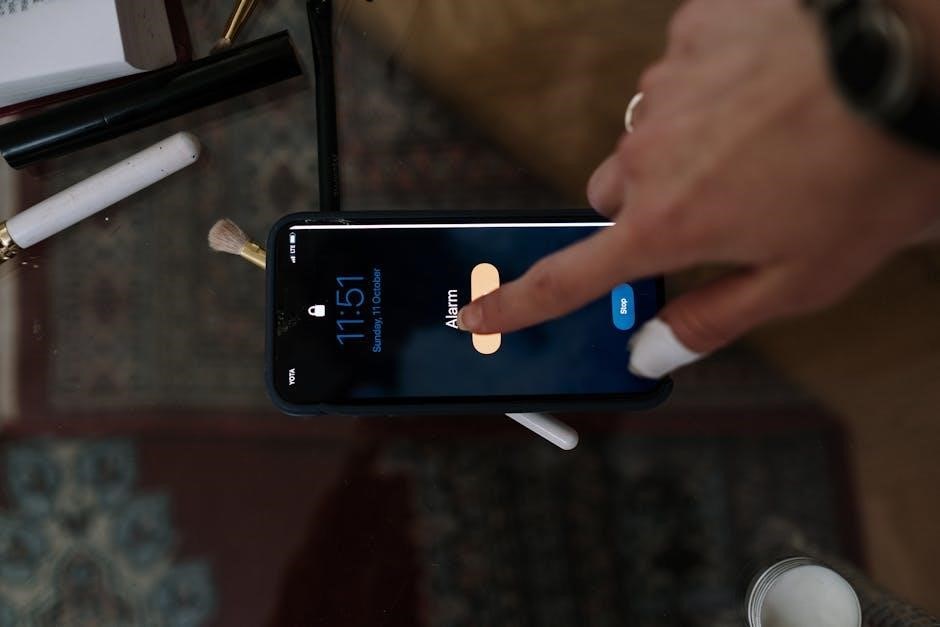
Step 3: Activating the Alarm
Activating the alarm on your JALL Sunrise Alarm Clock is a straightforward process once you’re familiar with the buttons. Begin by locating the Alarm 1 or Alarm 2 button, depending on which alarm you wish to activate. Press and hold the Alarm 1 button for 2-3 seconds until the alarm indicator light flashes, indicating that you’ve entered alarm-setting mode. Use the +/- buttons to adjust the alarm time to your desired wake-up time. Once set, press the Alarm 1 button again to save your settings and exit the mode.
Repeat the process for Alarm 2 if you want to set a second alarm, such as for weekends or a different wake-up time; Ensure that the alarm is enabled for the correct days by using the Day Select button, which allows you to choose specific days for the alarm to sound. The clock may also feature an LED indicator that lights up when the alarm is active, providing a visual confirmation that your settings are saved.
After activating the alarm, you can test it by pressing the Snooze button to preview the alarm sound and sunrise simulation. This ensures that everything is working as expected. Remember to set the correct time and date beforehand, as the alarm will not function properly without these settings. If you encounter any issues, refer to the user manual for troubleshooting tips or reset the clock if necessary.
- Press and hold the Alarm 1 or Alarm 2 button to enter alarm mode.
- Use the +/- buttons to set your desired wake-up time.
- Press the Alarm button again to save your settings.
- Use the Day Select button to choose the days the alarm should activate.
- Verify the alarm is active by checking the LED indicator.
By following these steps, you can easily activate the alarm on your JALL Sunrise Alarm Clock and start enjoying a gentle, sunrise-simulated wake-up experience.
Step 4: Setting the Alarm Time
Setting the alarm time on your JALL Sunrise Alarm Clock is a straightforward process that ensures you wake up at your desired time. Once you’ve activated the alarm mode, use the +/- buttons to adjust the alarm time. Press the + button to increase the time or the ౼ button to decrease it. The time will be displayed on the clock’s screen, allowing you to easily see your adjustments.
To set the hours, press and hold the + or ⎼ button until the hour value flashes. Release the button and use quick presses to fine-tune the hour. Repeat this process for the minutes, ensuring the time aligns with your wake-up preference. The clock supports both 12-hour and 24-hour time formats, depending on your settings. Once you’ve set the correct time, press the Alarm button to save your settings and exit the alarm time mode.

If you need to set a second alarm, repeat the process for Alarm 2. This feature is particularly useful for setting different wake-up times for weekdays and weekends. The clock also allows you to adjust the alarm time in 1-minute increments, providing precise control over when you want to wake up. After setting the time, the alarm will automatically activate for the selected days.
- Press the + or ⎼ button to adjust the alarm time.
- Hold the button to quickly scroll through hours or minutes.
- Press the Alarm button to save your settings.
- Repeat for Alarm 2 if needed.
Ensure the clock’s time and date are correctly set before finalizing the alarm time, as this ensures the alarm will activate at the right moment. The JALL Sunrise Alarm Clock’s intuitive design makes setting the alarm time a breeze, allowing you to customize your wake-up experience effortlessly.
Step 5: Adjusting the Sunrise Simulation
The sunrise simulation feature on your JALL Sunrise Alarm Clock is designed to gradually brighten the light, mimicking a natural sunrise to help you wake up more gently. To adjust this feature, press the Sunrise button until the simulation mode is activated. Use the + and ⎼ buttons to set the duration of the sunrise effect, which can range from 15 to 60 minutes. The default setting is typically 30 minutes, but you can customize it to suit your preferences.
While adjusting the sunrise simulation, the display will show the selected duration. Press the + button to increase the duration or the ౼ button to decrease it. Once you’ve set the desired duration, press the Alarm button to save your settings. The clock will then begin the sunrise simulation at the selected duration before your alarm time, ensuring a gradual wake-up experience.
In addition to setting the duration, you can also adjust the brightness levels for the sunrise simulation. Press the Brightness button to cycle through the available light intensity options. Choose a brightness level that suits your room’s lighting conditions, ensuring the simulation is effective without being overwhelming. Some models may allow you to customize the color temperature of the light during the simulation, adding to the natural sunrise effect.
For optimal results, ensure the clock is placed in a spot where the light can effectively simulate a sunrise in your room. If you prefer a shorter or longer wake-up period, adjust the simulation duration accordingly. The JALL Sunrise Alarm Clock’s flexibility in customizing the sunrise simulation makes it a versatile tool for improving your sleep and wake-up routine.
- Press the Sunrise button to enter simulation mode.
- Use + or ⎼ to adjust the duration (15–60 minutes).
- Press Alarm to save your settings.
- Adjust brightness using the Brightness button.
By customizing the sunrise simulation, you can create a wake-up experience that aligns with your natural circadian rhythm, helping you feel more refreshed and alert in the morning.
Step 6: Selecting the Alarm Sound

Selecting the alarm sound on your JALL Sunrise Alarm Clock is a straightforward process that allows you to choose from various options to suit your preferences. To begin, press the Alarm button, typically marked with a bell icon, to enter the alarm settings mode. This will activate the alarm function and allow you to navigate through the available sounds.
Once in the alarm settings, use the + and ⎼ buttons to cycle through the different alarm sounds. The JALL Sunrise Alarm Clock offers a range of options, including gentle nature sounds like birdsong, ocean waves, and soft music. Additionally, you may have the option to select the FM radio as your alarm sound, allowing you to wake up to your favorite radio station.
As you scroll through the sounds, each selection will be indicated by a brief preview. When you find a sound you prefer, press the Alarm button again to confirm your selection. The clock will then be set to wake you with the chosen sound at the designated time.
After selecting your alarm sound, you can also adjust the volume to ensure it is at a comfortable level. Use the Volume + and Volume ౼ buttons to increase or decrease the loudness. This feature ensures that the alarm is neither too startling nor too subtle, providing a gentle and effective wake-up experience.
Remember, the snooze function is separate from the alarm sound selection. Once your alarm sounds, you can press the Snooze button to delay the alarm for a few minutes. However, for now, focus on selecting the alarm sound that best suits your wake-up needs.
- Press the Alarm button to enter alarm settings.
- Use + and ౼ to navigate through available sounds.
- Press the Alarm button to select your preferred sound.
- Adjust the volume using the Volume + and Volume ⎼ buttons.
By following these steps, you can customize your wake-up experience with a pleasant and effective alarm sound that helps you start your day feeling refreshed and alert.
Step 7: Using the Snooze Function
The snooze function on the JALL Sunrise Alarm Clock is designed to give you a few extra minutes of rest after your alarm goes off. This feature is particularly useful for those who find it challenging to wake up immediately. To use the snooze function, follow these simple steps:
When your alarm sounds, press the Snooze button, typically marked with a sleep or clock icon. This will temporarily silence the alarm and delay it for a preset duration, usually 5-10 minutes.
The snooze function will repeat the alarm after the selected delay. You can press the snooze button multiple times to extend your rest period, provided the feature is enabled in the settings.
To deactivate the snooze function entirely, navigate to the alarm settings menu and disable the snooze option. This can be done by pressing and holding the snooze button for a few seconds or through the menu options outlined in the user manual.
If you wish to adjust the snooze duration, refer to the user manual for instructions on how to modify the snooze time. Some models allow you to customize the delay to suit your preferences.
The snooze function is optional and can be turned on or off based on your needs. It is a convenient feature that provides a gentle transition from sleep to wakefulness, allowing you to gradually adjust to being awake without feeling rushed.
- Press the Snooze button to delay the alarm.
- The alarm will sound again after the snooze duration.
- Disable snooze in the settings if you prefer not to use it.
- Adjust snooze duration through the menu if desired.
By utilizing the snooze function, you can enjoy a more flexible wake-up experience that accommodates your sleep patterns and daily routine.

Step 8: Adjusting Display Brightness
Adjusting the display brightness on your JALL Sunrise Alarm Clock is essential for ensuring the screen does not emit too much light, especially during the night. This feature allows you to customize the brightness to suit your preferences and ambient lighting conditions. Follow these steps to adjust the display brightness:

Locate the brightness adjustment buttons, typically marked with a “+” and “-” symbol. These buttons are usually found on the top or side of the clock.
Press the “+” button to increase the brightness or the “-” button to decrease it. The display will adjust accordingly, allowing you to find the perfect level for your room.
If your model has an auto-brightness feature, enable it to allow the clock to automatically adjust the brightness based on the surrounding light in the room.
Some models may require you to hold the brightness button for a few seconds to access the brightness settings menu. Refer to your user manual for specific instructions.
Once you’ve set your desired brightness level, the clock will save the setting automatically. You can revisit this feature anytime to make further adjustments.
Adjusting the display brightness ensures that the clock does not disrupt your sleep with excessive light. It also helps conserve battery life if the clock is not plugged into a power source.
- Use the “+” and “-” buttons to adjust brightness.
- Enable auto-brightness for automatic adjustments.
- Refer to the user manual for specific button functions.
- Save your preferred brightness level for consistent use.
By customizing the display brightness, you can create a more comfortable environment for sleeping and waking up with the sunrise simulation feature.
Pro Tip: If you prefer complete darkness, some models allow you to turn off the display entirely while still maintaining alarm functionality.
Step 9: Setting the Correct Time and Date

Setting the correct time and date on your JALL Sunrise Alarm Clock is crucial for ensuring your alarms and sunrise simulations occur at the right time. This step is straightforward and only requires a few button presses. Here’s how to do it:
Press and hold the Alarm 1 button until the time display begins to flash. This indicates that you’ve entered time-setting mode.
Use the + and ౼ buttons to adjust the hour. Continue pressing the buttons until the desired hour is displayed.
Press the Alarm 1 button again to move to the minutes. Use the + and ⎼ buttons to set the correct minute.
If your model includes a date feature, press the Alarm 1 button once more to access the date settings. Use the + and ⎼ buttons to adjust the day, month, and year as needed.
Once you’ve set the correct time and date, press the Alarm 1 button to save your settings and exit the time-setting mode.
Ensure that the clock is set to the correct time zone and format (12-hour or 24-hour) as specified in the user manual. Some models may also allow you to enable an auto-update feature, which synchronizes the time with an external signal for accuracy.
- Press and hold Alarm 1 to enter time-setting mode.
- Use + and ⎼ buttons to adjust hours and minutes.
- Press Alarm 1 to toggle between time and date settings.
- Save your settings by pressing Alarm 1 again.
Accurate time and date settings are essential for the alarm and sunrise simulation to function correctly. If you notice any discrepancies, refer to the user manual for additional guidance or troubleshooting steps.
Pro Tip: Double-check the time zone and format in the user manual to ensure your clock is configured properly for your location.
Step 10: Ensuring Power Supply
Ensuring a stable power supply is essential for the proper functioning of your JALL Sunrise Alarm Clock. Without consistent power, the alarm and sunrise simulation features may not work as intended, potentially disrupting your wake-up routine.
Connect the Clock to a Power Source: Use the provided USB cable to plug the clock into a nearby electrical outlet or a USB port on your computer. Ensure the connection is secure to avoid any interruptions.
Check the Power Cord: Verify that the USB cable is not damaged or frayed. If you suspect any issues with the cable, replace it immediately to maintain a reliable connection.
Battery Installation (if applicable): Some models of the JALL Sunrise Alarm Clock come with a backup battery option. If your clock has this feature, ensure the batteries are installed correctly and are fully charged. Refer to the user manual for specific instructions on battery placement and type.
Monitor Power Indicators: Many JALL Sunrise Alarm Clocks have power indicators, such as LED lights, that signal when the device is properly powered. If the light is off or flashing, it may indicate a problem with the power supply.
Avoid Power Outages: To prevent unexpected interruptions, consider using a surge protector or uninterruptible power supply (UPS) for your clock, especially in areas prone to power outages.
Regular Maintenance: Periodically inspect the USB port and battery compartment for dust or debris, which could interfere with the power connection. Clean these areas gently with a soft cloth if necessary.
By following these steps, you can ensure that your JALL Sunrise Alarm Clock remains powered and ready to provide a gentle, simulated sunrise to start your day. A stable power supply is crucial for maintaining consistent alarm functionality and overall performance.
- Connect the clock to a reliable power source using the provided USB cable.
- Inspect the power cord and replace it if damaged.
- Install or charge backup batteries as needed.
- Monitor power indicators for any issues.
- Use a surge protector to safeguard against power outages.
- Perform regular maintenance to keep the power components clean.
For additional guidance, refer to the user manual or contact customer support if you encounter any power-related issues.
Step 11: Exploring Smart Features
The JALL Sunrise Alarm Clock offers a variety of smart features designed to enhance your wake-up experience and provide greater convenience. Exploring these features allows you to customize the clock to suit your preferences and lifestyle.
Sunrise Simulation: One of the standout features of the JALL Sunrise Alarm Clock is its sunrise simulation. This feature gradually increases the light intensity over a set period, mimicking a natural sunrise. You can adjust the duration of the simulation (typically between 10 to 60 minutes) to wake up more naturally.
Dual Alarms: The clock allows you to set two separate alarms, which is ideal for partners with different wake-up times or for setting a weekday and weekend alarm. This feature ensures that both users can wake up to their preferred settings without disturbing each other.
FM Radio and White Noise: The JALL Sunrise Alarm Clock comes with an FM radio and white noise machine, offering multiple wake-up options. You can choose to wake up to your favorite radio station, a gentle alarm sound, or soothing white noise.
Touch Control: Many models feature a touch-sensitive interface, making it easy to adjust settings or snooze the alarm with a simple tap on the screen.
Smartphone Connectivity: Some versions of the JALL Sunrise Alarm Clock can be connected to your smartphone via Bluetooth. This allows you to stream music, set alarms remotely, or even control the clock through a dedicated app.
USB Charging Port: The clock often includes a built-in USB port, allowing you to charge your phone or other devices while you sleep. This convenient feature keeps your nightstand clutter-free.
Programmable Settings: You can customize the brightness, alarm volume, and sunrise duration to your liking. These settings can be saved and adjusted at any time for a personalized experience.
By exploring these smart features, you can unlock the full potential of your JALL Sunrise Alarm Clock and enjoy a more tailored and convenient wake-up experience. Take the time to familiarize yourself with each feature to make the most of your investment.
Step 12: Testing Your Settings
Once you’ve configured all your settings, it’s essential to test them to ensure everything works as expected. Testing helps you identify any issues and make necessary adjustments before relying on the alarm for waking up.
Simulate a Wake-Up: Set the current time a few minutes before your alarm time and activate the alarm. Observe how the sunrise simulation progresses, ensuring the light and sound gradually increase as intended. This step helps verify that both the light and sound alarms are functioning correctly.
Check the FM Radio: If you’ve selected an FM radio station as your wake-up sound, tune into the station and ensure it plays clearly. Adjust the antenna if needed for better reception. Also, test the volume levels to make sure they’re appropriate for your wake-up time.
Test Snooze Functionality: Trigger the snooze feature by tapping the snooze button (usually marked with a “Z” or snooze icon). Ensure the alarm pauses for the set duration (typically 5-10 minutes) and restarts correctly. This ensures you won’t oversleep if you hit snooze.
Verify Display Brightness: Adjust the display brightness to a comfortable level for your room. If the clock has an auto-dimming feature, test it in both bright and dark environments to ensure it adapts properly.
Confirm Time Accuracy: Double-check that the clock is displaying the correct time and date. An incorrect time can lead to missed alarms, so synchronization is crucial.
Test USB Charging Port: If your JALL Sunrise Alarm Clock has a USB port, plug in your phone or another device to ensure it charges correctly while the clock is powered on.
Backup Your Settings: After testing, ensure all settings are saved. Some models may require you to press and hold a button to confirm your adjustments.

Final Test Run: Perform a final test run by simulating a full wake-up cycle. This ensures that the alarm, sunrise simulation, and any additional features you’ve enabled work seamlessly together.

By thoroughly testing your settings, you can ensure your JALL Sunrise Alarm Clock performs reliably and meets your expectations. If you encounter any issues, refer to the troubleshooting section of the user manual or reset the clock if necessary.
Step 13: Troubleshooting with the Reset Button
If you encounter any issues with your JALL Sunrise Alarm Clock, such as incorrect time display, alarm malfunctions, or unresponsive buttons, resetting the clock can often resolve the problem. The reset button is a useful feature designed to restore the clock to its factory settings, allowing you to start fresh.
When to Use the Reset Button:
- The clock is not turning on or responding to button presses.
- The alarm is not sounding at the correct time.
- The display shows incorrect information or is malfunctioning.
- You want to revert all settings to their default configuration.

How to Reset the Clock:
- Locate the reset button, which is typically found on the back or bottom of the clock. It may be labeled as “Reset” or marked with a small hole requiring a pin to press.
- Using a paper clip or a small pin, gently press and hold the reset button for 3-5 seconds until the display lights up or the clock emits a short beep.
- Release the reset button. The clock will power off and then automatically restart.
- Once the clock restarts, all settings, including alarms, sunrise simulation, and FM radio presets, will be reset to their default values.
What Happens After a Reset:
After resetting, you’ll need to reconfigure all settings, including the time, date, and alarms. This is a good opportunity to double-check the user manual and ensure all features are set up correctly. If the issue persists after resetting, it may indicate a hardware problem, and you should contact customer support or refer to the warranty information.
Tips for Avoiding Future Issues:
- Regularly update the clock’s time and date to ensure accuracy.
- Avoid exposing the clock to extreme temperatures or moisture.
- Use the provided power adapter to prevent power supply issues.
By using the reset button, you can quickly address most common problems and get your JALL Sunrise Alarm Clock functioning properly again. If the problem persists, consult the user manual or reach out to the manufacturer for assistance.