Ernesto Manual Sausage Maker: A Comprehensive Guide
Embark on a flavorful journey with the Ernesto Manual Sausage Maker, a cornerstone for home artisans! This guide details everything needed to craft delicious sausages,
from setup to storage.
Ernesto sausage makers represent a time-honored tradition of crafting homemade sausages, offering a delightful alternative to store-bought options. These manual machines empower culinary enthusiasts to control ingredients, seasonings, and textures, resulting in uniquely personalized flavors. The appeal lies in the hands-on experience, connecting you directly to the food preparation process.
For generations, home sausage making was a necessity, preserving meat and creating flavorful meals. Ernesto has revived this practice with robust, user-friendly equipment. Their makers are designed for both beginners and experienced sausage crafters, providing a reliable and efficient method for producing a wide variety of sausages – from classic Italian to spicy chorizo.
This guide will delve into the specifics of the Ernesto manual sausage maker, covering assembly, operation, cleaning, and troubleshooting. Prepare to unlock a world of culinary creativity and savor the satisfaction of making your own delicious, high-quality sausages!
What is a Manual Sausage Maker?
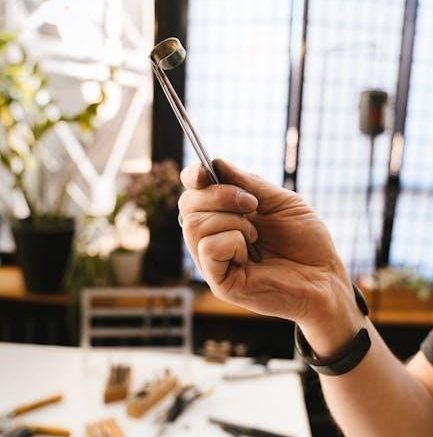
A manual sausage maker is a mechanical device used to stuff ground meat into casings, forming sausages without the need for electricity. Unlike electric models, it relies on human power, typically through a hand crank, to operate a piston or screw mechanism. This simplicity makes it a reliable choice, especially for smaller batches and those seeking a more traditional approach.
The core function involves placing prepared meat mixture into a hopper, then using the crank to push or rotate the meat through a filling tube and into the casing. The user controls the speed and pressure, allowing for precise filling and minimizing air pockets. Manual makers are often favored for their portability and ease of cleaning.
Ernesto manual sausage makers specifically embody this principle, offering durable construction and efficient operation. They provide a cost-effective and satisfying way to create homemade sausages, granting complete control over the entire process, from meat selection to final product.
Why Choose Ernesto? Brand Overview
Ernesto has established itself as a trusted name in kitchen tools, particularly renowned for its manual sausage makers. The brand distinguishes itself through a commitment to robust construction, utilizing high-quality stainless steel and durable materials designed for longevity. This focus ensures the maker can withstand repeated use and the pressures of sausage production.
Beyond durability, Ernesto prioritizes user-friendliness. Their designs are intuitive, making the sausage-making process accessible to both beginners and experienced enthusiasts. The ergonomic handles and smooth ratchet mechanisms contribute to comfortable and efficient operation.
Ernesto also offers a range of sizes and models to accommodate varying needs, from small-batch hobbyists to those producing larger quantities. Coupled with a reputation for excellent customer support and readily available replacement parts, choosing Ernesto means investing in a reliable and supported sausage-making experience.
Components of the Ernesto Manual Sausage Maker
Dissecting the Ernesto reveals a robust build: a main body housing the gear system, interchangeable filling tubes, a handle with ratchet, and a secure base for stability.
The Main Body & Gear System
The heart of the Ernesto manual sausage maker lies within its durable, typically cast iron, main body. This robust construction ensures stability during the often-forceful process of sausage filling. Encased within is a meticulously engineered gear system, crucial for converting the rotational force from the handle into the necessary pressure to push meat through the filling tubes.
These gears are designed for efficiency and longevity, often made from hardened steel to withstand repeated use and the density of various meat mixtures. The gear ratio is carefully calibrated to provide a balance between ease of turning and sufficient filling power. Inspecting these gears regularly for wear and tear is vital for maintaining optimal performance. Proper lubrication, as detailed later, is also key to smooth operation and preventing premature failure of this critical component. The body’s design also incorporates mounting points for secure attachment to a work surface.
Filling Tubes & Sizes
Ernesto manual sausage makers commonly include a selection of stainless steel filling tubes, catering to diverse sausage diameters. These tubes dictate the thickness of the final product, ranging typically from sizes suitable for breakfast links to larger diameter sausages like Italian or Bratwurst. Common sizes often include ¼ inch, ⅜ inch, ½ inch, and ¾ inch diameters, providing versatility for various recipes.
The tubes easily attach to the front of the main body, securely threading into place. Quality Ernesto models feature smooth interiors to minimize friction and ensure consistent filling. Choosing the correct tube size is crucial; smaller tubes require more force but yield finer sausages, while larger tubes are quicker to fill but demand precise casing handling. Regularly cleaning the tubes is essential to prevent meat buildup and maintain hygienic operation. Some sets may also include a specialized tube for making pepperoni sticks or other uniquely shaped sausages.
Handle & Ratchet Mechanism
The handle and ratchet mechanism are central to the efficient operation of an Ernesto manual sausage maker. A robust, typically steel or durable composite handle provides the leverage needed to press the meat through the filling tube. The ratchet system is a key feature, allowing for continuous filling without needing to reposition the handle after each turn.
This mechanism engages with a pawl, enabling a back-and-forth motion that drives the piston; Quality Ernesto models boast smooth, reliable ratchet action, minimizing user fatigue during extended sausage-making sessions. Some handles are ergonomically designed for comfortable grip. Regular inspection of the ratchet and pawl is crucial; occasional lubrication with food-grade grease ensures smooth operation. A well-maintained handle and ratchet system translate directly into consistent sausage production and a more enjoyable experience. Proper use avoids strain and maximizes filling efficiency.
Base & Mounting Options
A stable base is paramount when operating an Ernesto manual sausage maker, ensuring consistent pressure and preventing accidents. Most models feature a heavy-duty base, often constructed from cast iron or durable plastic, designed to resist movement during use. Crucially, Ernesto sausage makers offer versatile mounting options.
Many are equipped with screw holes allowing secure attachment to a countertop or sturdy table. This is highly recommended, especially when dealing with larger batches or applying significant force. Suction cup bases are also available on some models, providing a temporary, non-permanent mounting solution. The stability of the base directly impacts filling consistency and user safety. Always ensure the maker is firmly secured before beginning the sausage-making process. A wobbly base can lead to uneven filling and potential injury, so prioritize a solid setup.
Setting Up Your Ernesto Sausage Maker
Proper setup is vital for successful sausage creation! This section guides you through assembling your Ernesto maker, securing it, and preparing the meat for optimal results.
Assembly Instructions – Step-by-Step
Begin by unpacking all components and verifying everything is present according to the parts list. First, attach the base to the main body using the provided screws; ensure it’s firmly secured for stability during operation. Next, insert the gear pin into the designated slot, confirming it clicks into place – this is crucial for the ratchet mechanism.
Carefully screw the filling tube onto the front of the main body, selecting the appropriate size for your desired sausage diameter. Gently slide the pusher plate onto the filling tube, ensuring smooth movement. Finally, attach the handle to the ratchet, again verifying a secure connection.
Before first use, lightly lubricate all moving parts with food-grade grease to ensure smooth operation and prevent sticking. Double-check all connections for tightness before proceeding to the next step. A properly assembled Ernesto sausage maker will feel solid and operate smoothly with each turn of the handle.
Securing the Maker to a Work Surface
Stability is paramount when operating the Ernesto Manual Sausage Maker. The robust base provides a good foundation, but securing it further enhances safety and efficiency. Utilize the integrated screw holes in the base to firmly attach the maker to a sturdy countertop or table.
For added grip, consider placing a damp cloth or rubber mat underneath the base to prevent slippage, especially on smooth surfaces. Avoid using excessive force when tightening screws, as this could damage the base or countertop. Ensure the work surface is level to prevent uneven pressure during sausage filling.
A securely mounted sausage maker minimizes wobble and allows you to apply consistent pressure with the handle, resulting in evenly filled sausages. This is particularly important when working with larger batches or tougher meat mixtures. Prioritize a stable setup for a smoother, more enjoyable sausage-making experience.
Preparing the Meat – Grind & Temperature
Optimal meat preparation is crucial for successful sausage making with the Ernesto Manual Sausage Maker. Begin with thoroughly chilled meat, ideally between 28°F and 32°F (-2°C and 0°C). This maintains fat integrity and prevents smearing during grinding.
Pre-grinding the meat to the desired consistency is essential. A coarse grind is suitable for traditional sausages, while a finer grind works well for emulsified varieties. Ensure all meat is cut into pieces that will easily feed into your grinder. Remove any sinew or bone fragments.
Maintaining a cold temperature throughout the process is vital. Keep the meat and grinder components chilled in the freezer for 30 minutes before use. Work quickly to prevent warming, and return unused portions to the refrigerator or freezer immediately. Cold meat yields a superior texture and prevents bacterial growth, ensuring a safe and delicious final product.
The Sausage Making Process with Ernesto
Now, let’s transform prepared ingredients into delectable sausages using your Ernesto Manual Sausage Maker! This section guides you through casing preparation, loading, and filling techniques.
Casings Preparation – Natural vs. Synthetic
Choosing the right casing is crucial for sausage texture and bite. Natural casings, traditionally derived from animal intestines (hog, sheep, or beef), offer a distinct snap and flavor permeability. They require thorough rinsing, both inside and out, to remove salt and impurities. Soaking in lukewarm water for at least 30 minutes further softens them, making them easier to load onto the filling horn.

Synthetic casings, typically made from collagen or cellulose, provide consistency and convenience. Collagen casings mimic the texture of natural casings, while cellulose casings are often used for cooked sausages. These generally require less preparation – a simple rinse in cool water is usually sufficient. However, always follow the manufacturer’s instructions for specific soaking or hydration times.
Regardless of your choice, ensure casings are thoroughly checked for holes or imperfections before use. A small needle can repair minor flaws. Properly prepared casings are pliable, smooth, and ready to receive the delicious sausage mixture from your Ernesto Manual Sausage Maker!
Loading the Casing onto the Filling Tube
Begin by gently sliding the prepared casing onto the filling tube of your Ernesto Manual Sausage Maker. Avoid stretching the casing excessively, as this can lead to tearing during filling. Start with a generous length – several feet – to provide ample material for maneuvering.
Gather the casing onto the tube, creating a slight overhang. This overhang will be crucial for tying off the sausage links later. Some find it helpful to lightly moisten the casing with water to reduce friction and facilitate smooth movement onto the tube. Ensure there are no twists or kinks in the casing as you advance it.
Once the casing is securely on the tube, gently push it forward, leaving enough slack at the end to form a knot. A properly loaded casing should move freely along the filling tube without bunching or binding. This careful preparation ensures even filling and prevents frustrating interruptions during the sausage-making process with your Ernesto maker!
Filling the Sausage – Technique & Pressure
Initiate the filling process slowly with your Ernesto Manual Sausage Maker, applying steady, even pressure to the handle. Avoid rapid cranking, as this can overfill the casing and cause it to burst. Observe the casing closely as it fills, noting the density and uniformity of the meat distribution.

Maintain consistent pressure to ensure a tightly packed sausage, but avoid excessive force. Too much pressure can strain the maker and potentially damage the casing. A gentle, rhythmic motion is key to achieving optimal results. Periodically pause to release any air bubbles trapped within the casing.
As the sausage lengthens, guide it gently with your hands, preventing it from coiling or twisting. Control the filling speed to match the casing’s ability to stretch and accommodate the meat. With practice, you’ll develop a feel for the ideal pressure and technique for consistently perfect sausages using your Ernesto!

Cleaning and Maintenance
Preserve your Ernesto Sausage Maker’s longevity through diligent cleaning! Prompt disassembly and washing after each use prevents residue buildup and ensures hygienic sausage creation.
Disassembly for Thorough Cleaning
Begin the cleaning process by carefully disassembling your Ernesto Manual Sausage Maker. First, release any remaining pressure in the cylinder. Then, remove the filling tube – gently twisting while pulling upwards is often effective. Next, detach the handle from the ratchet mechanism; usually, a simple pull or release clip secures it.
The gear system, crucial for operation, requires attention. Depending on the model, this might involve unscrewing a retaining knob or releasing a locking pin. Once loosened, carefully lift the gears away from the main body. Finally, detach the base – if it’s suction-mounted, release the suction before attempting removal.
Lay out all components on a clean surface. This allows for a systematic cleaning approach and prevents losing small parts. Remember to note the order of disassembly; taking a quick photo can be incredibly helpful during reassembly. Proper disassembly is the first step towards a sparkling clean and well-maintained sausage maker!
Cleaning Procedures – Safe Materials & Methods
Prioritize gentle cleaning to preserve your Ernesto Manual Sausage Maker’s longevity. Avoid abrasive cleaners, scouring pads, or harsh chemicals, as these can damage the metal and plastic components. Warm, soapy water is your best friend! Use a mild dish soap and a soft sponge or cloth.
For stubborn meat residue, allow components to soak in warm, soapy water for 10-15 minutes before scrubbing. Pay close attention to the filling tube and gear system, ensuring all traces of meat are removed. Rinse thoroughly under running water, ensuring no soap residue remains.
The main body can be wiped down with a damp cloth. Avoid submerging the entire unit in water, especially if it contains any electrical components (though manual models are generally safe). Dry all parts completely with a clean towel before reassembly. A food-safe sanitizer can be used for extra hygiene, but always rinse thoroughly afterward.
Lubrication & Storage
Maintaining smooth operation requires occasional lubrication of the Ernesto Manual Sausage Maker’s gear system. Apply a food-grade lubricant, such as mineral oil or a specialized sausage maker grease, sparingly to the gears after each thorough cleaning. This prevents corrosion and ensures effortless turning.
Proper storage is crucial for longevity. Before storing, ensure the sausage maker is completely dry to prevent rust. Disassemble the unit for better airflow and to prevent parts from sticking together. Store in a cool, dry place, away from direct sunlight and extreme temperatures.
Consider wrapping individual components in a protective cloth or plastic wrap to prevent scratches. A dedicated storage container or bag will keep all parts organized and readily accessible for your next sausage-making adventure. Regular lubrication and careful storage will guarantee years of reliable performance!

Troubleshooting Common Issues
Encountering problems? This section addresses frequent issues with your Ernesto sausage maker, offering solutions for filling, casing, and handle malfunctions, ensuring smooth operation.
Sausage Maker Not Filling Properly
If your Ernesto manual sausage maker isn’t dispensing meat, several factors could be at play. First, ensure the meat mixture isn’t too lean; sufficient fat content is crucial for smooth flow. Excessively dry meat will resist movement through the chamber.
Secondly, verify the gears are correctly engaged and properly lubricated. A lack of lubrication creates friction, hindering the mechanism. Check for any obstructions within the filling chamber or the auger itself – bone fragments or gristle can cause blockages.
Also, confirm the filling tube isn’t overly long or bent sharply, as this increases resistance. Ensure the pressure plate is adequately tightened to push the meat forward consistently. Finally, consider the meat temperature; slightly chilled meat generally fills better than warm meat. Experiment with these adjustments to restore proper filling function.
Casing Rupturing During Filling
Experiencing casing ruptures while using your Ernesto manual sausage maker is frustrating, but often preventable. The most common cause is overfilling – applying too much pressure forces the casing beyond its elastic limit. Start with a slower, more controlled filling pace, and avoid excessive force on the handle.
Another key factor is casing preparation. Natural casings require thorough soaking and flushing to become pliable. Synthetic casings, while more durable, still need proper hydration. Ensure casings aren’t brittle or damaged before loading.
Furthermore, the casing size must match the filling tube diameter. Using a tube that’s too large for the casing will inevitably lead to bursting. Finally, inspect the casing for weak spots or imperfections before use. Gently stretch the casing to test its strength and discard any compromised sections.
Handle Difficulties & Ratchet Problems
Encountering resistance or issues with the handle and ratchet mechanism on your Ernesto manual sausage maker can disrupt the process. Often, this stems from insufficient lubrication of the gears. Apply food-grade lubricant to the gears regularly, as detailed in the maintenance section, to ensure smooth operation.
If the handle feels stuck, avoid forcing it. Check for meat particles obstructing the gears. Disassemble the relevant parts (following cleaning instructions) and carefully remove any debris. Ensure the ratchet pawl is engaging correctly with the gear teeth; misalignment can cause slippage.
Persistent ratchet problems might indicate wear and tear on the pawl or gear teeth. Inspect these components for damage. While replacement parts are sometimes available, consider the age of the maker. A smooth, consistent motion is crucial; address handle issues promptly to prevent further complications.